This guide walks you through adding your first client, so you can begin assigning tasks and tracking progress.
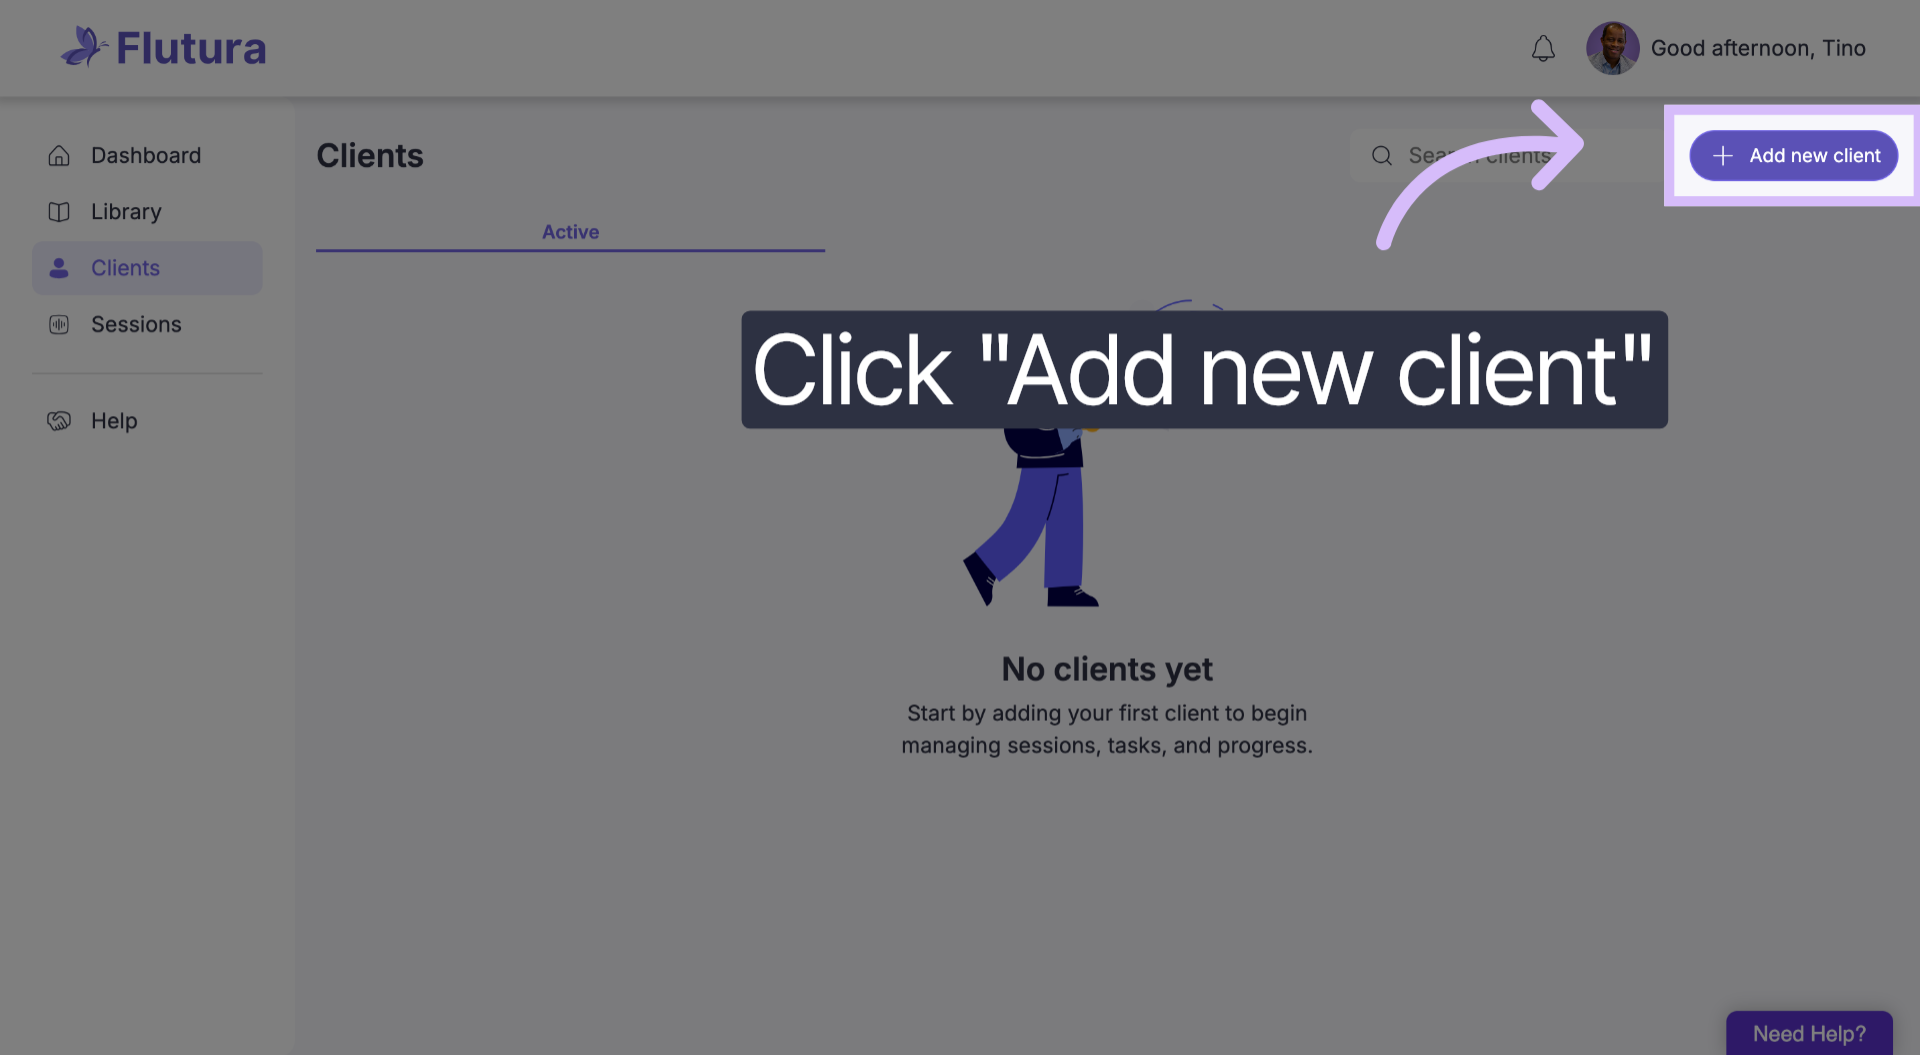
From your dashboard, click Clients in the left-hand navigation bar.
In the Clients screen, select the Add Client button.
Fill in the client’s:
Full name
Email address
Gender (optional)
Date of birth (optional)
Phone
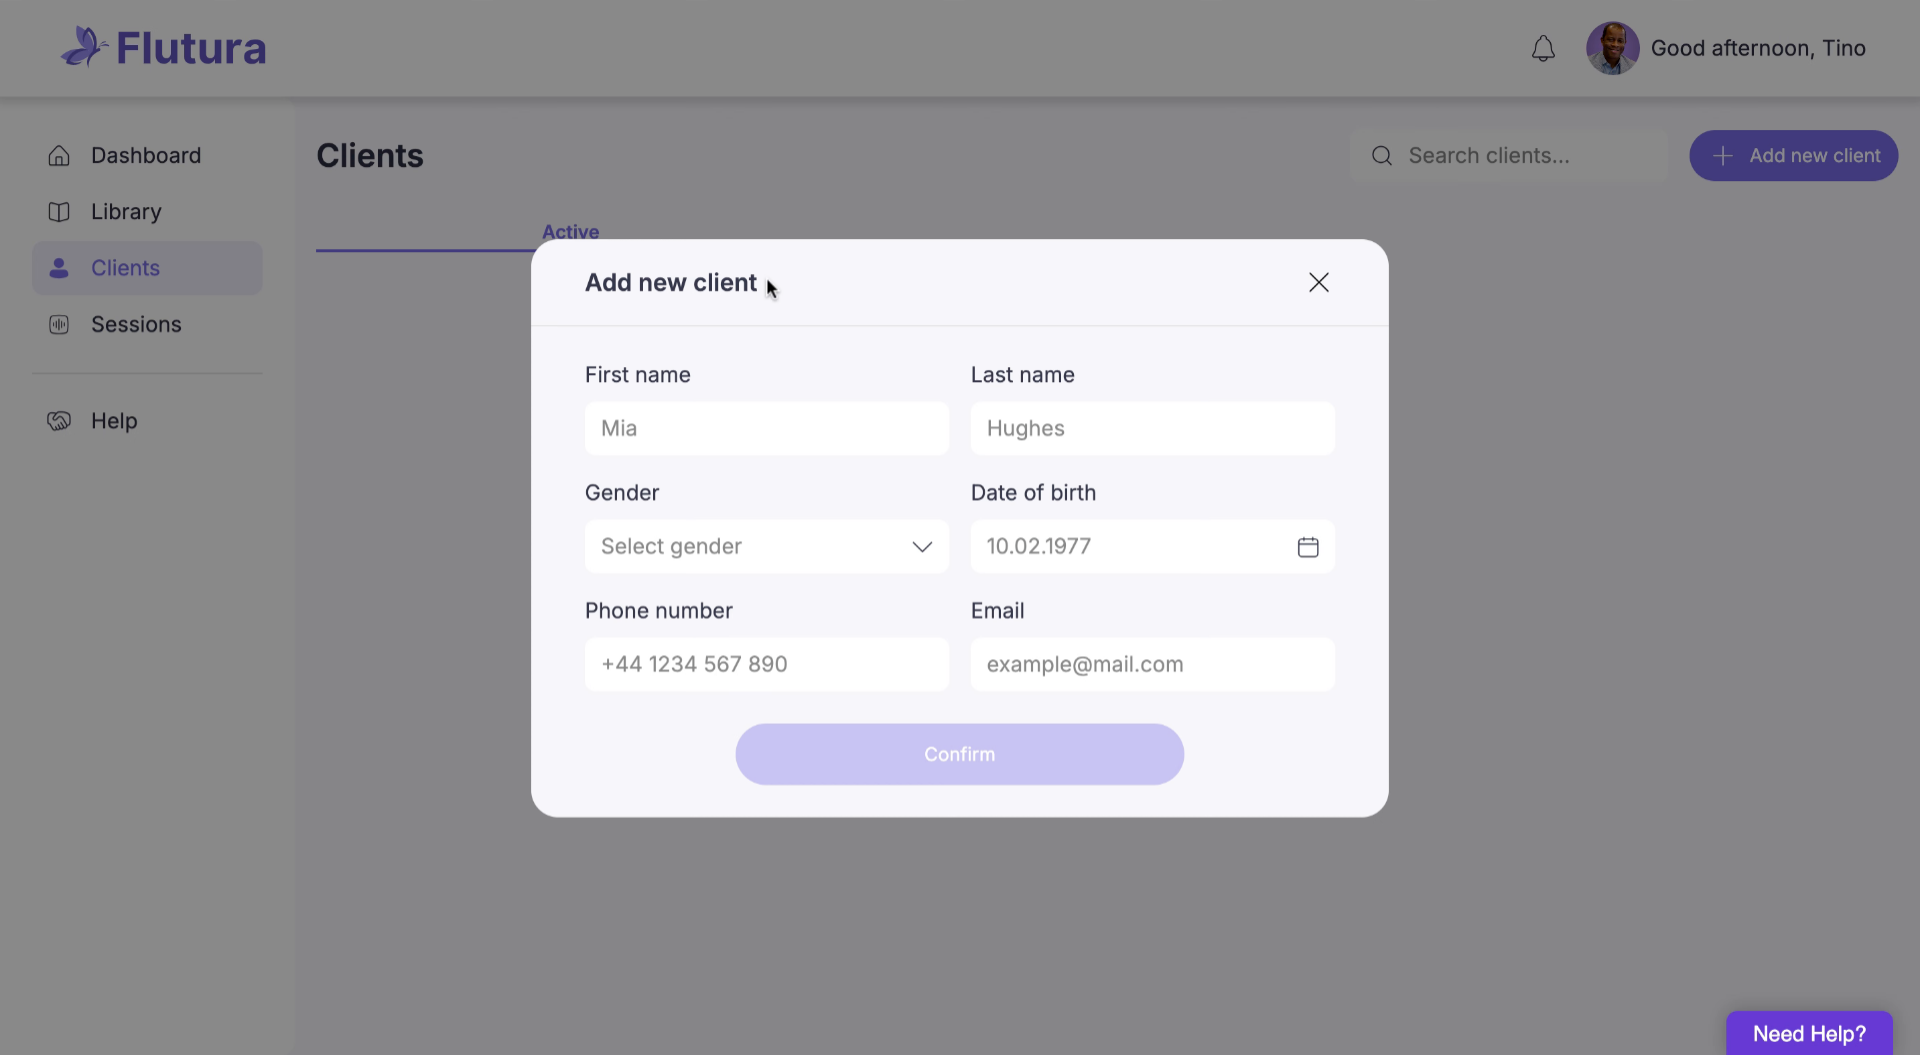
Click Save. Flutura will send the client an email invitation to set up their account.
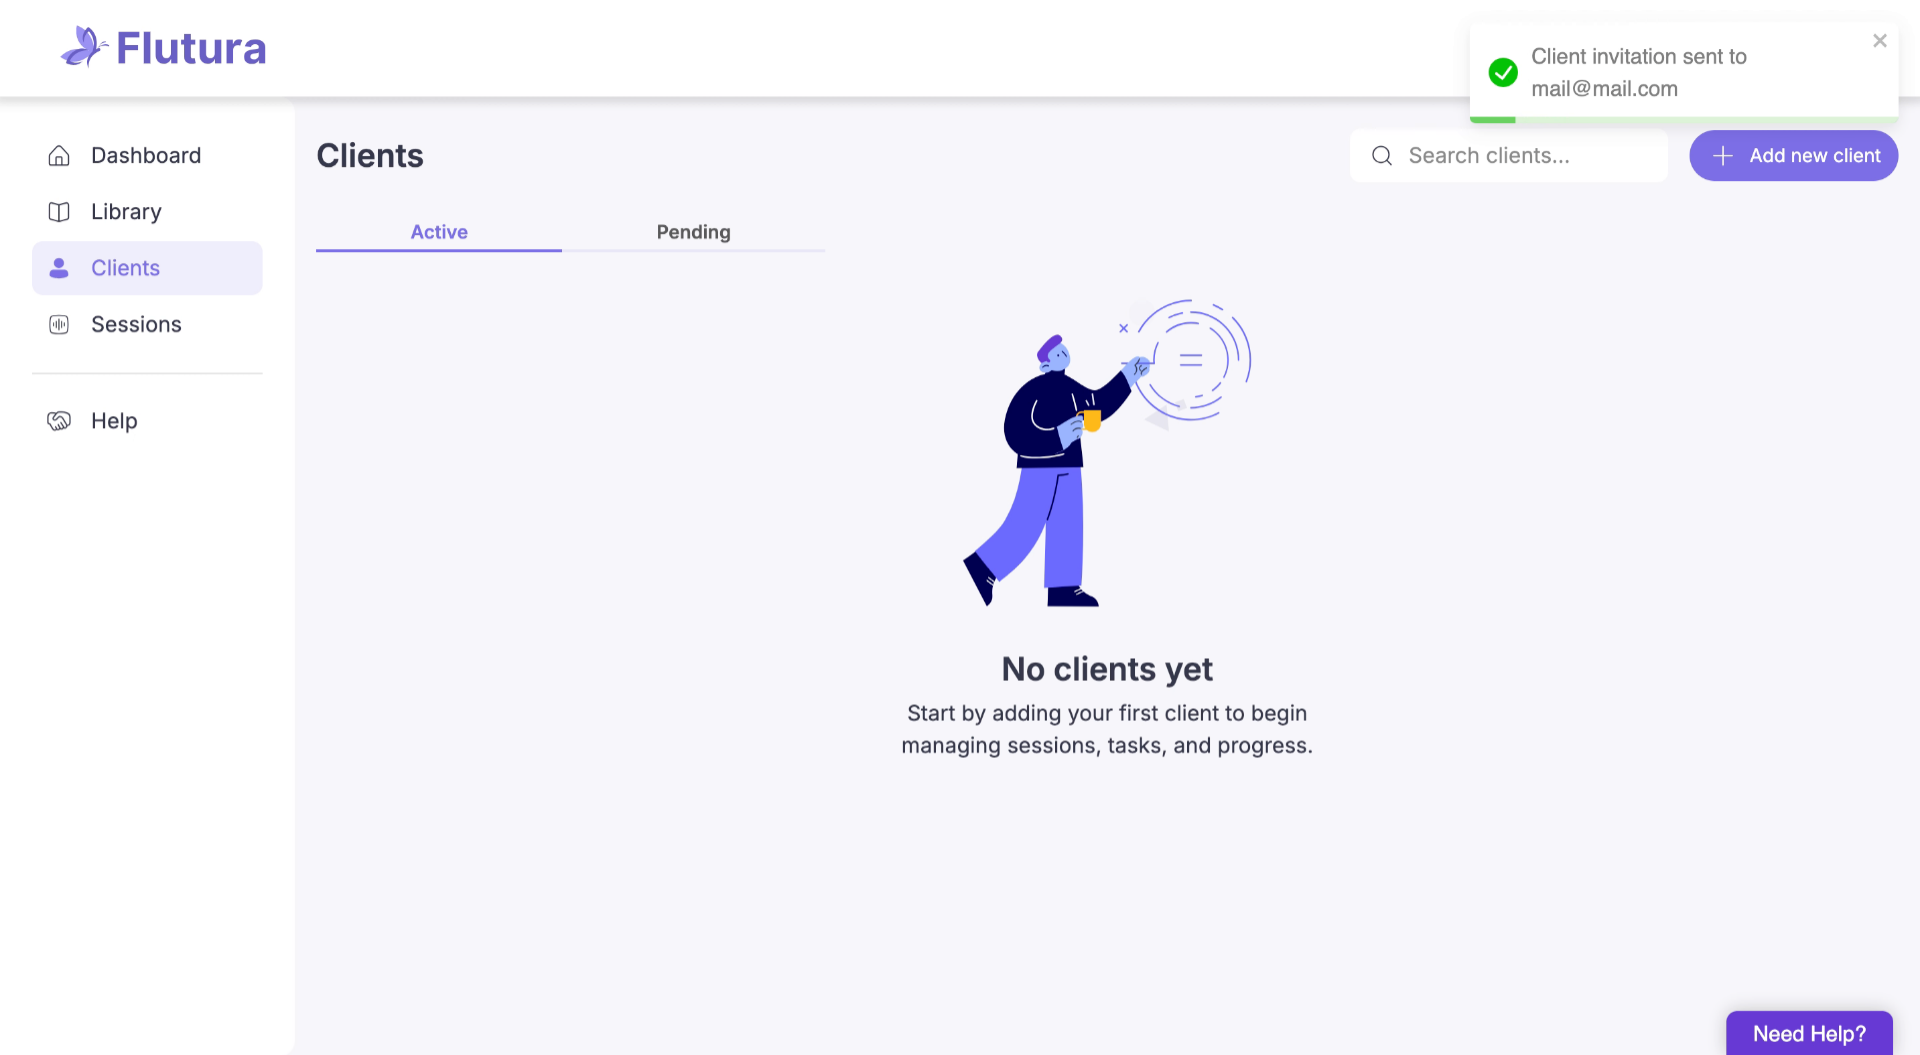
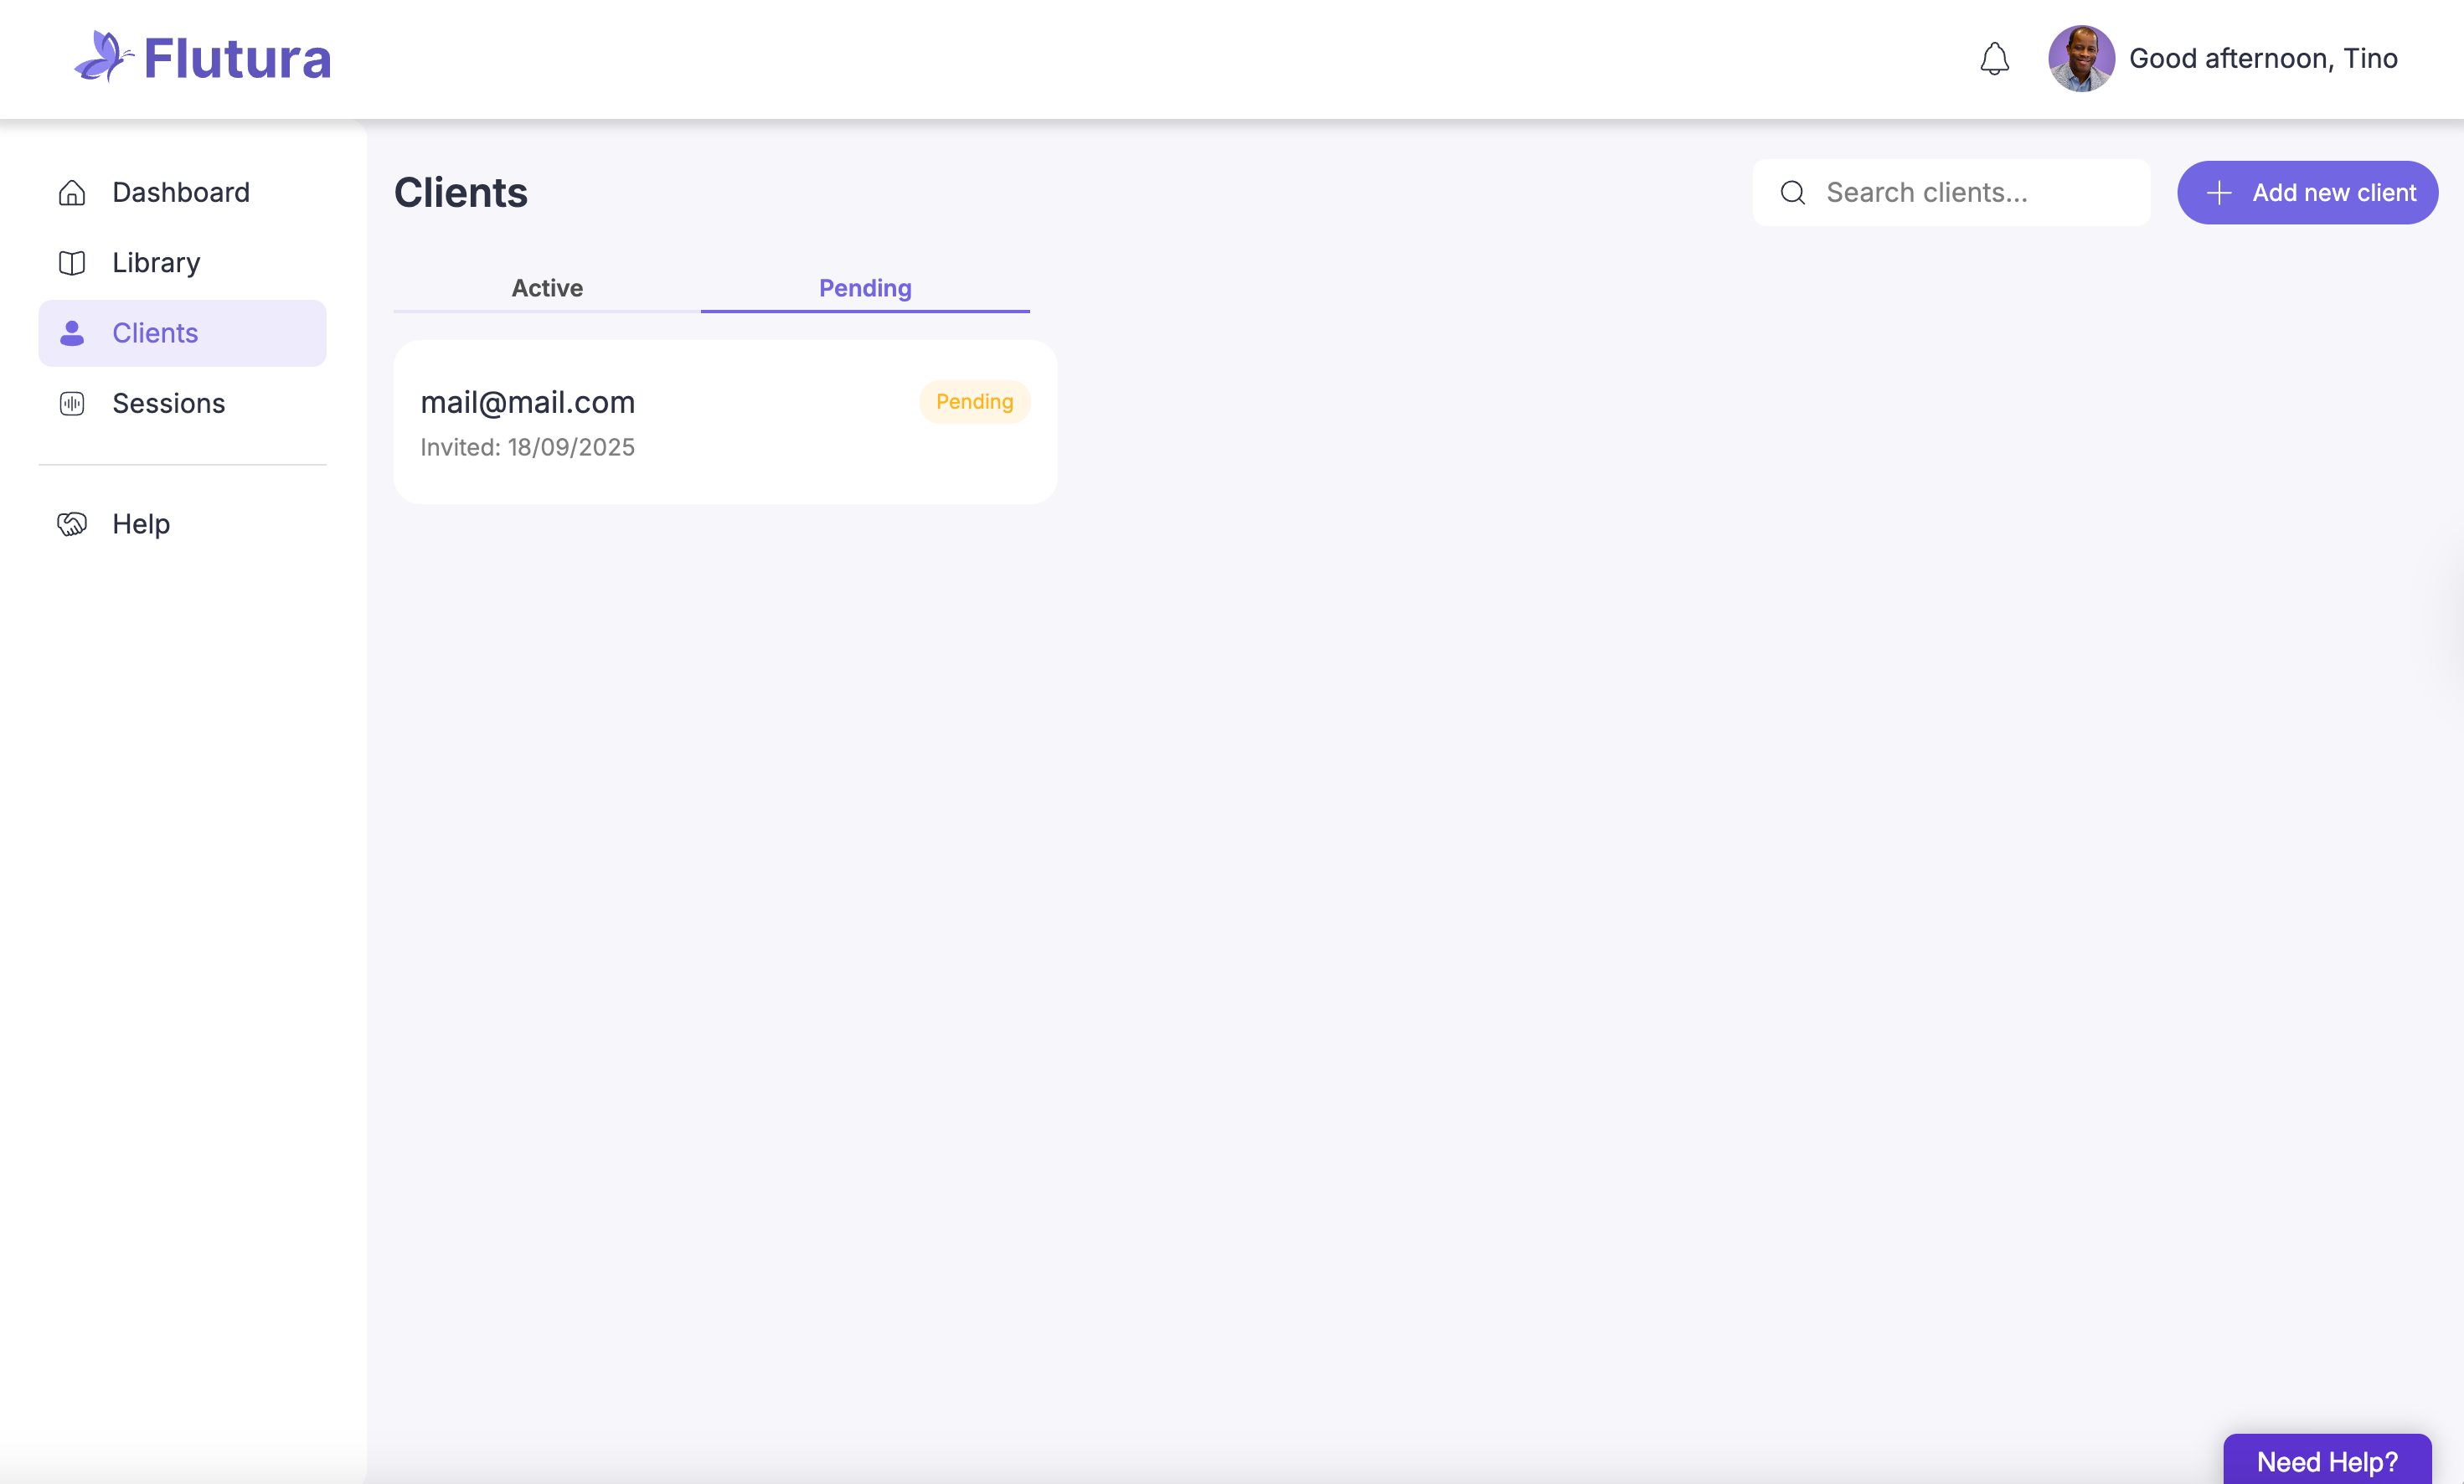
The client now appears in your Clients dashboard, under the Pending tab.
The client must set up their account before you can assign tasks, review notes, or track progress.
Client not receiving the invite? Ask them to check their spam/junk folder.
Email already in use? The client may already have an account—contact support if you need it linked to your practice.
Accidentally entered details wrong? Open the client profile, click Edit, and update their information.
